Belongings can pass through several hands before reaching their final room. A moving storage inventory checklist keeps each box, furniture piece, and condition note tied to one record. Build it before anything leaves your home, then update it at every handoff.
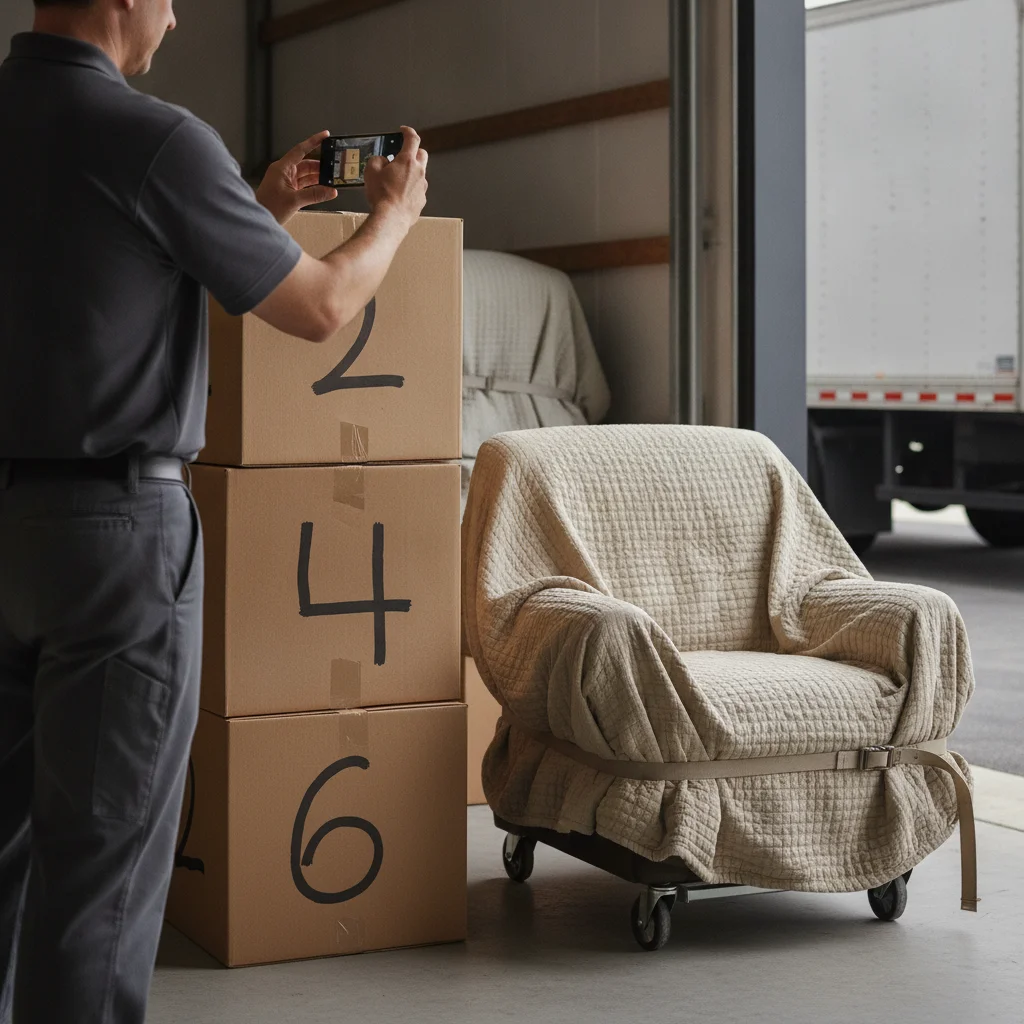
Build a room-by-room storage inventory
Start the inventory while belongings still sit in recognizable rooms. Walking through the home in order reduces missed closets, cabinets, patios, and garage shelves. It also creates labels that make sense when everything looks alike in storage.
Assign each room a short code. A primary bedroom could be PB, while a kitchen could be K. Number each packed container within that room, such as K-01 or PB-04. Put the code on more than one visible side. Your written or digital record should repeat that exact code.
For every box, record:
- The room code and box number
- A short description of the contents
- The general condition before packing
- Whether the box contains fragile or priority items
- The planned destination room
- Its current location after each handoff
Keep descriptions useful without exposing sensitive details. “Tax records” or “financial files” reveals more than “household documents.” Jewelry and other small valuables shouldn’t be listed on labels visible outside the box.
List unboxed belongings separately. Give each chair, table, mirror, lamp, and wrapped furniture piece its own number. Note detachable parts under the parent item. For example, record a table and its wrapped hardware bag together.
A spreadsheet works well, but a paper copy can travel with you. Save another copy somewhere separate from the shipment. The format matters less than consistent labels.
If you’re still deciding how storage fits into the move, review these San Diego moving storage options. Keep that choice separate from the inventory itself.
Photograph condition without exposing private records
Photograph each item or sealed box before it leaves its starting room. Begin with one wide image showing the full item. Then capture existing scratches, dents, stains, chipped corners, or torn fabric. Take close photographs and one wider view showing where each mark appears.
Include the inventory number in the frame. A removable label placed beside the item can connect the photograph with its record. Don’t cover the area you’re documenting. Confirm that the number is readable before moving to the next item.
For boxes, photograph the sealed top and visible sides. Record crushed corners, old tape, water marks, or reused-box wear before pickup. Avoid claiming a box was spotless when the image shows otherwise. Neutral notes are easier to reconcile later.
Privacy needs its own check. Close document folders before taking room photographs. Turn over mail, prescription labels, identification cards, account statements, and school records. Watch for reflections in mirrors, windows, televisions, and framed glass. Crop or retake any image that exposes private information.
Create folders that follow the same room codes as the inventory. Keep the original files, rather than relying only on screenshots or compressed messages. Review any sharing permissions before sending a photo folder to someone else.
Add the date and a short caption to the inventory entry. Don’t edit the underlying image to hide condition details. If you need a privacy-safe copy, keep the original and create a separate cropped version.
Separate items that need provider approval
Storage and moving providers set their own acceptance rules. Those rules weren’t confirmed for every company or facility, so don’t assume an item will be accepted. Ask each provider directly and keep its answer with your inventory.
Create a review list before packing. Include anything that may need special handling, separate paperwork, or a different plan. Examples to ask about include food, plants, fuel-powered tools, aerosols, medications, household chemicals, firearms, wine, artwork, and private records. This list doesn’t mean every provider rejects those items. It means you need a clear answer before the handoff.
Send the provider an item description that’s specific enough to evaluate. “Garage supplies” is vague. “Empty lawn tool with a separate fuel container” gives the provider more context. Don’t describe an item as drained, empty, disconnected, or prepared until you’ve personally confirmed that condition.
Add an approval column to the inventory. Record who gave the answer, when it was received, and any instructions they provided. Attach written guidance to the related item entry. If an answer is unclear, mark the item unresolved and keep it outside the storage shipment.
If movers will transport belongings to or from storage, search the company’s legal name through the BHGS household mover license search. California household movers are regulated by the Bureau of Household Goods and Services, not the CSLB.
Master Movers San Diego doesn’t own a storage facility or store belongings. Our storage service referrals connect customers with independent local movers for the transportation portion.

Match access needs to the storage arrangement
An accurate list can still become frustrating if urgent belongings disappear behind everything else. Add an access rating to each entry before loading begins. Simple labels such as “needed first,” “occasional access,” and “store until delivery” keep the choice practical.
Build a short priority zone on paper. It might include work equipment, children’s supplies, seasonal clothing, basic kitchen items, mobility equipment, or move-related documents. Keep private papers and valuables under your control when appropriate, based on your provider’s instructions and your own needs.
Record the planned position of each priority item. “Near entry, left side” is more useful than “front.” For a portable container, that entry changes when doors close and the container moves. For a facility or mover-controlled arrangement, customer access may depend on the provider’s terms. Confirm those terms directly and write down the answer.
San Diego moves often begin in very different settings. Your handoff could start at a downtown loading area, a Chula Vista garage, or an Encinitas apartment curb. Describe the actual pickup point in the inventory notes. Include stairs, elevators, gates, parking limits, and building instructions only after confirming them with the property contact.
Don’t turn the inventory into a rough size estimate. Once your container count stabilizes, use this San Diego storage unit size guide to prepare questions for the storage provider. The provider should confirm available space and access terms.
Keep a simple location map beside the inventory. Update it if items are rearranged. Cross out the old location without deleting its history.
Reconcile the inventory at each handoff
Treat every transfer as a checkpoint. This includes pickup from the home, delivery into storage, removal from storage, and final delivery. Open the current inventory before items start moving. Don’t wait until the truck or storage area is empty.
Count labeled boxes and individually numbered pieces by room code. Compare that count with the prior checkpoint. Mark each item as seen, missing, added, or changed. If a label can’t be read, assign a temporary exception note instead of guessing which entry it matches.
Photograph the grouped shipment before loading and after placement. Capture enough context to show where the numbered items were located. Don’t open sealed boxes merely to create a new photograph unless the owner and provider agree that opening is appropriate.
Ask each company how it documents custody and exceptions. Don’t assume a signature, warehouse record, app entry, or driver note has the same meaning across providers. Keep copies of any paperwork you receive. Record names exactly as shown on those documents.
When you notice a condition change, pause that item’s reconciliation. Take a wide photograph, close photographs, and a neutral written note. “New scrape visible on right rear leg at storage removal” is clearer than assigning blame before the records are reviewed. Notify the relevant provider through its stated process and retain what you sent.
Use a final exception list after delivery. Separate unresolved items from boxes that simply haven’t been unpacked. A box can be present while its contents remain unchecked. Mark it accordingly.
Keep the completed inventory, photographs, provider instructions, and handoff records together. The goal is one continuous history. Each item should connect back to its first label and condition record.
When to call us
Professional help makes sense when storage handoffs include heavy furniture, many rooms, restricted building access, or separate pickup and delivery dates. Master Movers San Diego can match you with an independent mover for the transportation work. Call us at (858) 400-4069 and we’ll connect you with a permitted local mover.